
Caster.fm API provides you with a streaming server (Icecast 2 Streaming Server) and a management interface/app, in order to broadcast your content online you’ll need to use a broadcast software to stream your content from your computer to the server, in this tutorial we will show how to install, configure and utilize LadioCast to do that.
Start Streaming Server
Before you can connect with the broadcast software you will need to start the server.
To do so, go to the Streaming Server block at the app dashboard and click the “Start Server” button.
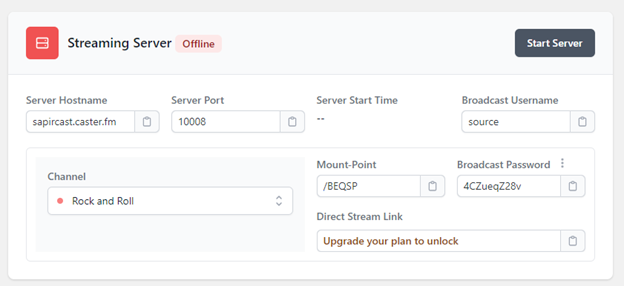
At this block you will also have the server information you will need in order to configure your broadcast software.
Connect with LadioCast to the streaming server
LadioCast is a free software available on Mac OS X platform that streams digital audio such as Internet radio program. LadioCast is available in different languages such as English or Japanese. Iscompatible with Mac and is completely free to download. It will allow you to broadcast audio from your microphone and also mix music. The interface is simple and straight forward, having displayed 4 inputs and 4 outputs, so you can manage multiple devices.
Characteristics
- Supports Ogg Vorbis, MP3, AAC, HE-AAC, Ogg Opus and Ogg PCMOgg Vorbis, MP3, AAC, HE-AAC, Ogg Opus and Ogg PCM encoding formats
- 4in/4out/4bus audio mixer
- Transmits audio streaming to multiple servers in the same time
- Controllable connection events by AppleScript
- SSL supported
Download and install
You can download FREE LadioCast here.
Configuration
Once you have downloaded your software, you can open the application. Go to the top navigation bar and click on Streamer1 -> IceCast.
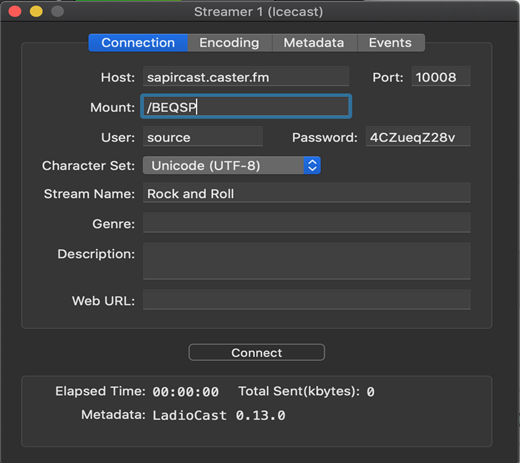
Click the Connection tab and fill in the streaming server information as provided at the app dashboard as described at the beginning of the tutorial.
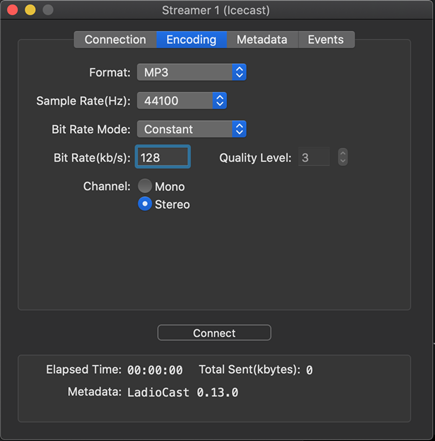
Next move over to the Encoding tab.
Select the Format (encoding) and Bitrate according to your plan and set the Bitrate Mode to Constant.
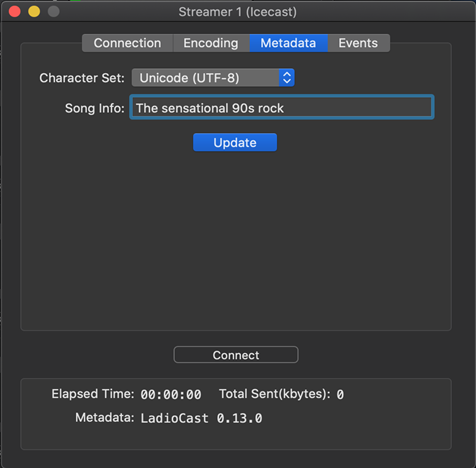
Next at the Metadata tab you can fill in your broadcast name, this will be displayed to your listeners as the currently playing song.
Click Update to save and continue.

Next head over to Input 1 and select your audio input and output devices.

Now head to the Streamer dialog and click the Connect button to start your broadcast.