
Caster.fm API provides you with a streaming server (Icecast 2 Streaming Server) and a management interface/app, in order to broadcast your content online you’ll need to use a broadcast software to stream your content from your computer to the server, in this tutorial we will show how to install, configure and utilize BUTT to do that.
Start Streaming Server
Before you can connect with the broadcast software you will need to start the server.
To do so, go to the Streaming Server block at the app dashboard and click the “Start Server” button.
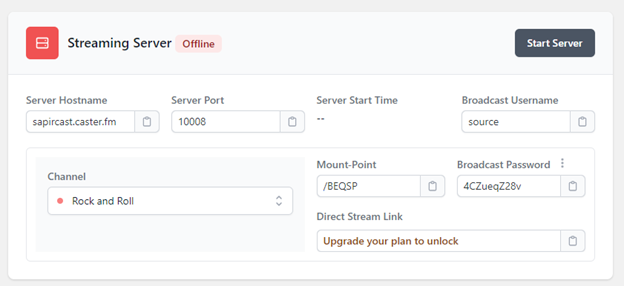
At this block you will also have the server information you will need in order to configure your broadcast software.
Connect with BUTT to the streaming server
BUTT comes from broadcasting using this tool, is a FREE broadcast software. Being an easy to use tool, it is a multi-platform software, which makes it compatible with Windows, Mac and Linux. BUTT allows users to stream live audio data from computers or internet access points, using Mic or Line inputs to icecast servers. It has also a recording feature which makes it a great tool for recording your broadcasts.
Software Characteristics
- Supports aac+, mp3, ogg/vorbis, ogg/opus and ogg/FLAC for streaming
- Supports aac+, mp3, ogg/vorbis, ogg/opus, ogg/FLAC and wav for recording
- Connects to a server automatically at startup
- Connects to a server automatically when starting a recording
- Split recordings after a specific amount of time
- Import or export configuration files
- Update manually or automatically (by reading a file) current songs
- Current status display
- Automatically reconnects, in case of lost connection
- Streams and records different bitrates
- Amplifies or attenuates input volumes
- Customizable display colors
Download and install
You can download the software here for free.
Configuration
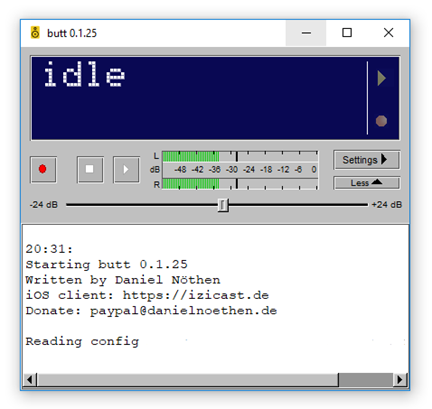
After you launch the software for the first time you will need to configure the streaming server and metadata settings.
Click the Settings button at the top-mid corner to open the settings window.
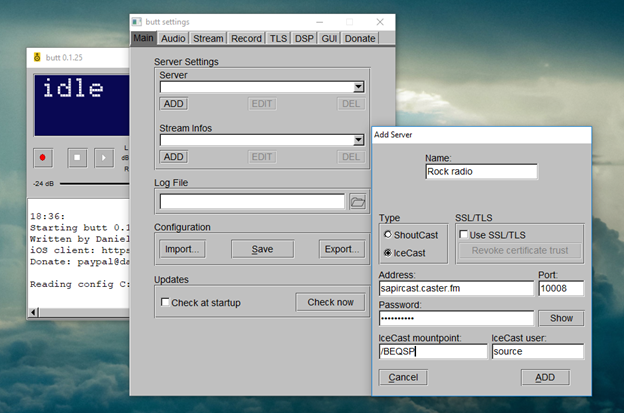
At the Main tab click the ADD button underneath the Server select box to configure the streaming server information.
At the server type select Icecast, fill the rest of the fields with the values from the app dashboard as showed at the beginning of the article and click ADD.
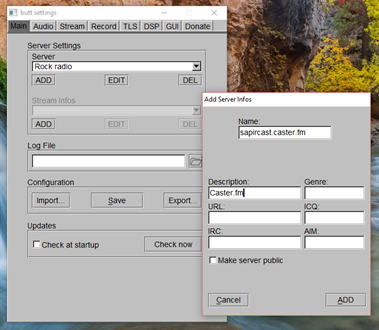
Next, Click the ADD button underneath the Stream Infos select box, fill in your station / broadcast information (stream name and description) and click ADD.
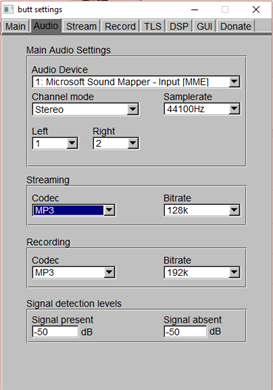
Next move to the Audio tab of the Settings window, select your Audio input Device, then specify the desired Codec(encoding) and Bitrate under the Streaming label, move back to the Main tab and click the Save button.
Broadcasting
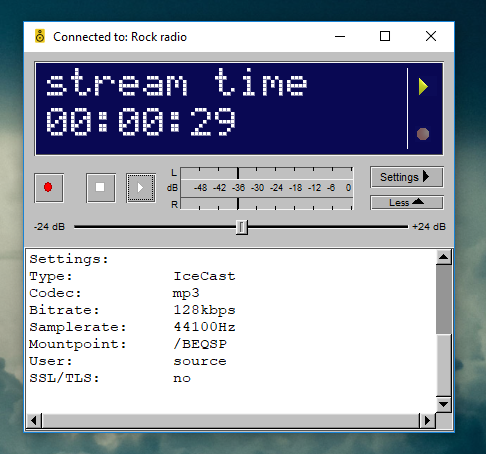
After setting up the configuration for the first time, to start broadcasting simply click the Play button. Once you are connected to the server you should see a “Connection established”.
And that’s it, you are now live on air.